D365 Business Central : Set Default Sorting on Page
When designing a page, particularly for Historical Tables, setting a default sorting order is important. But how do we modify this default sorting? Let’s dive into it.
Setting Default Sorting on New Page
To change the default sorting on a new page, we can use the SourceTableView properties. Here’s an example with a new page:
page 60001 "Test Customer_TNG"
{
    ApplicationArea = All;
    Caption = 'Test Customer';
    PageType = List;
    SourceTable = "Customer";
    UsageCategory = Lists;
    SourceTableView = order(descending);

    layout
    {...
    }
}
As you can see, the default sorting order for this page is set to descending.
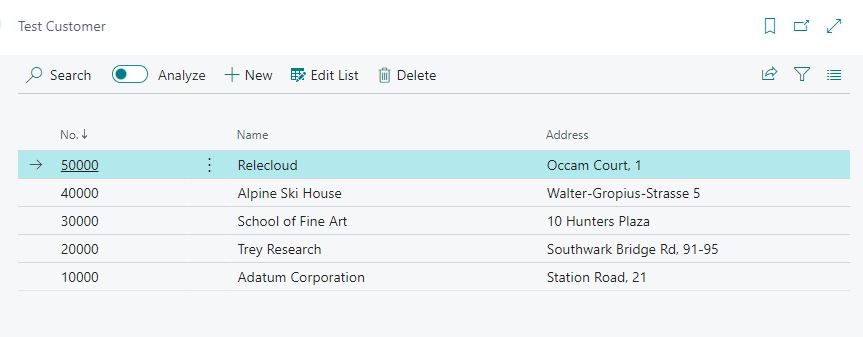
But what if we want to sort by the ‘Address’ field instead of the ‘No.’ field? We can achieve this by specifying the Sorting key.
page 60001 "Test Customer_TNG"
{
ApplicationArea = All;
Caption = 'Test Customer';
PageType = List;
SourceTable = "Customer";
UsageCategory = Lists;
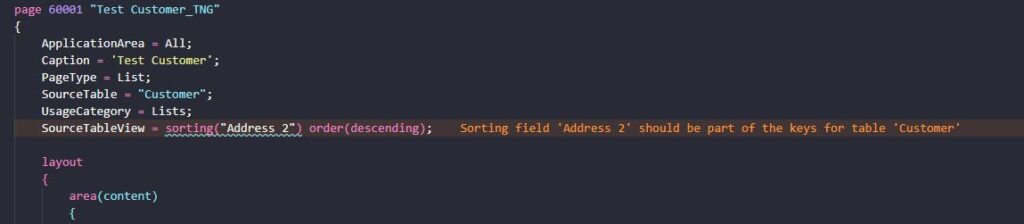
SourceTableView = sorting(Address) order(descending);
layout
{ ...
}
}

Now, the default sorting is based on the ‘Address’ field. However, remember that sorting fields should be part of the keys, otherwise, you’ll receive a warning.
Set Default Sorting on Page Extension
What if we need to modify the sorting on an existing page using a page extension? Attempting to use the SourceTableView property will result in an error.

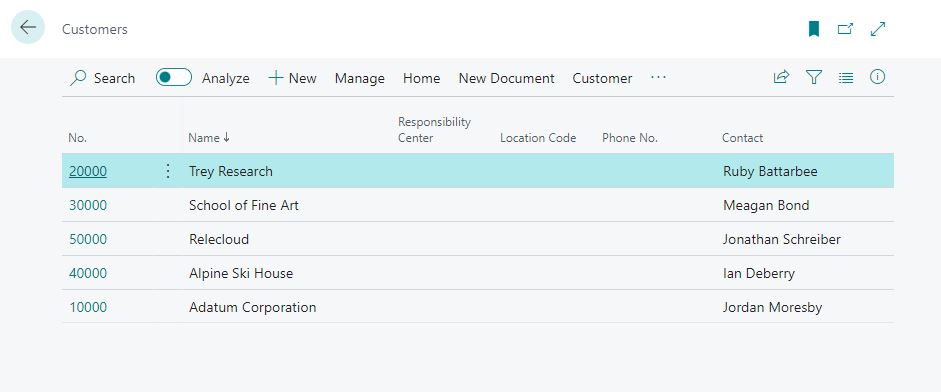
To solve this isse, we can use SetCurrentKey and Ascending on the OnOpenPage trigger.
pageextension 60001 "Customer List_TNG" extends "Customer List"
{
    trigger OnOpenPage()
    begin
        Rec.SetCurrentKey(Name);
        Rec.Ascending(false);
    end;
}
Result:
And there you have it. You’ve now learned how to set default sorting on both new and existing pages. Hope you learn something from it.