One of the highly anticipated features in Dynamics 365 Business Central 2023 Wave 1 (BC22) is the Master Data Management. This feature has been requested by numerous customers for quite some time, and it is now finally available on Business Central.
Master data management is designed for scenarios where you want to transfer masters and setups from one company to another in the same environment. It acts as a data synchronization engine that lets you keep data in the companies synchronized after the initial transfer.
With the Master Data Management feature, we now have the following capabilities for managing master data:
-
Moving master data between companies: It allows you to synchronize tables and fields data from another company.
-
You can define the tables and fields to synchronize. For more control over the synchronization, you can filter on table records. You can also set up more advanced synchronization couplings.
-
Changes in the main company are immediately pulled to the receiving companies by the job queue.
-
Users in the receiving company can review synchronization logs to track changes and resolve any issues.
It’s important to note that the synchronization process is based on a pull model, not a push model. This means that subsidiaries pull data from the source company, and once the synchronization is set up, job queue entries start updating data in subsidiaries whenever changes are made in the source company.
It is recommended to do one-way synchronization. Although it’s possible, Microsoft doesn’t recommend to set up bi-directional (two-ways) synchronization. Synchronizing data in both directions can lead to conflicts or unwanted overwrites.
Requirement
To set up synchronization, there are a few requirements to keep in mind:
-
All companies must be in the same environment.
-
The user setting up the subsidiary company must have the “Master Data Mgt. - View” permission set, which is available in the Premium and Essential licenses. The Team Member license allows access but not modification of records, so it cannot be used to set up synchronization.
Steps
For demonstration purposes, let’s assume we have two companies - a Master Company and a subsidiary company (e.g., NZ Company) that will pull data from the Master Company. All setup and processes will be done on the subsidiary company (NZ Company).
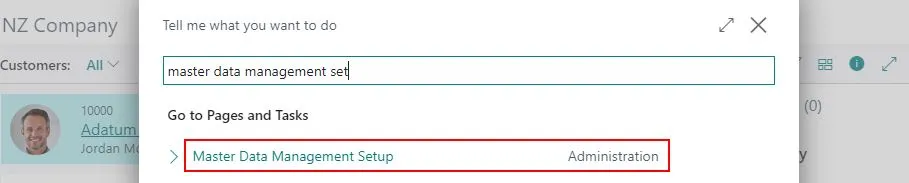
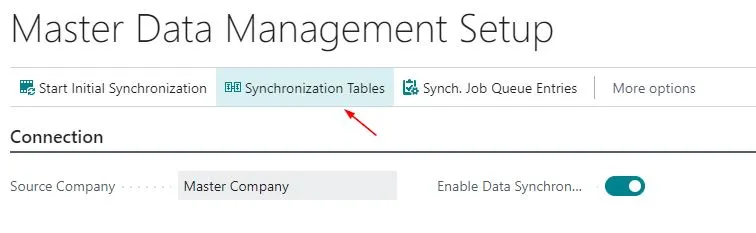
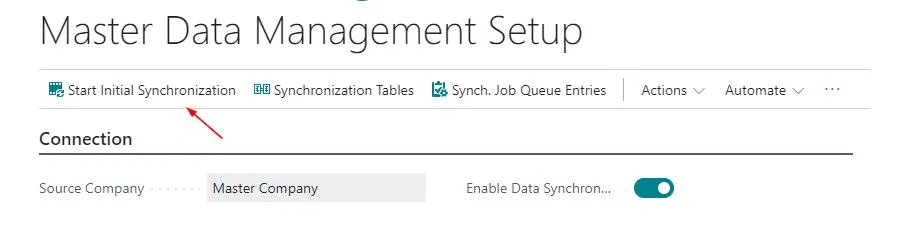
In the NZ Company, go to search icon, enter Master Data Management Setup, and choose the related link.
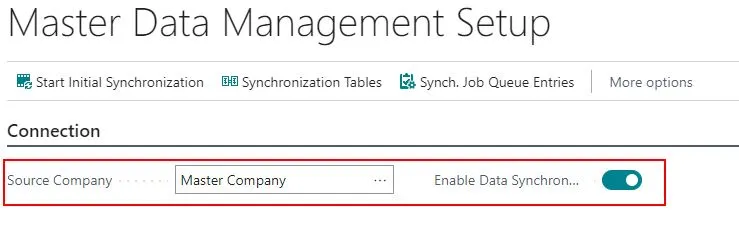
Specify the Source Company field as Master Company, then turn on Enable Synchronization toggle.
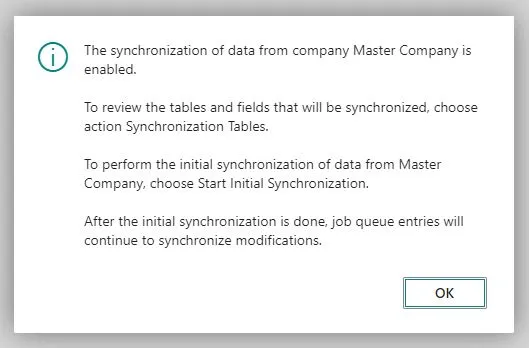
Click OK on the confirmation dialog.
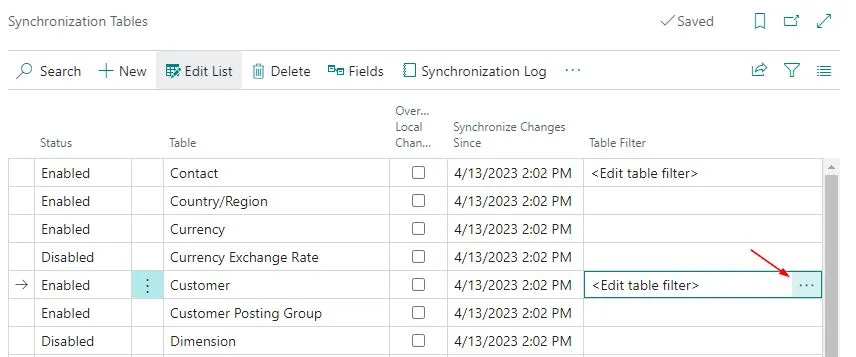
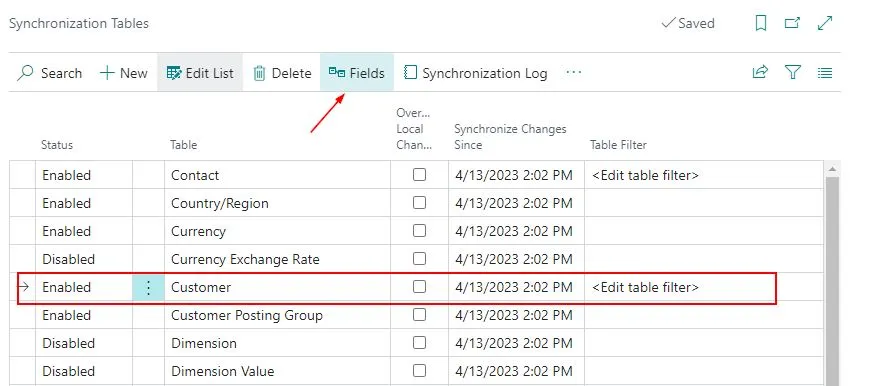
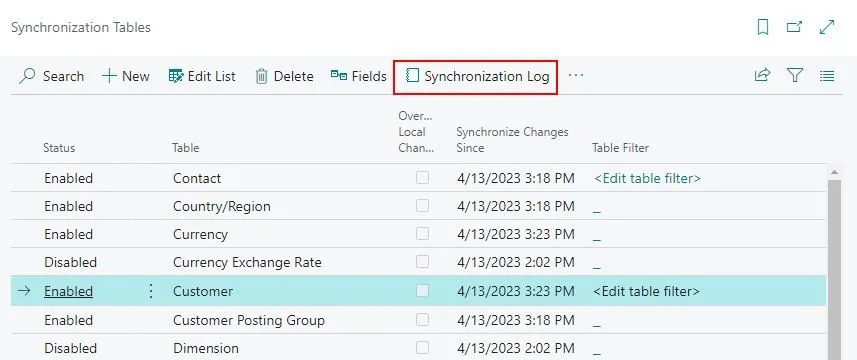
Click on “Synchronization Tables” to specify which tables and fields you want to synchronize. By default, Business Central provides a list of tables that are commonly synchronized, but you can modify, disable, or delete them as needed..
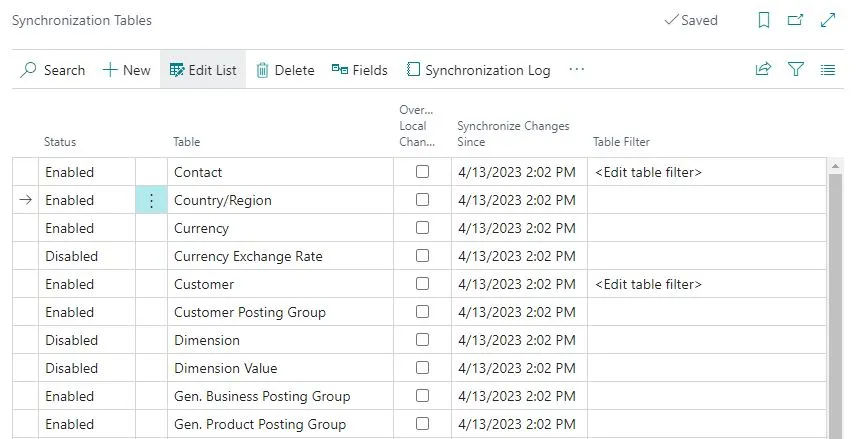
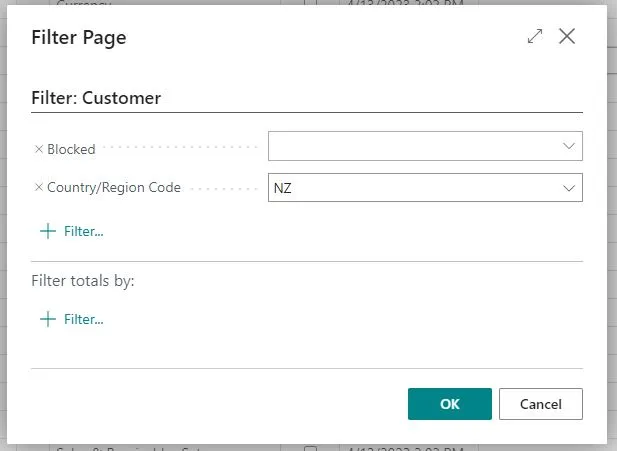
The Table Filter field allows you to control what data gets synchronized for each table by setting up filters based on specific conditions. For example, you can add filters that specify that you synchronize only customers in a certain region or vendors with a certain currency.
We can also choose which fields we want to synchronize. Some fields on the tables are already disabled because they probably aren’t relevant for the subsidiary. Select the table and click on the Fields to access it.
We can enable or disable field synchronization. We can also specify whether we want to run field validation or overwrite local change. We specify Overwrite Local Change if the synchronization should overwrite the local change that was done after the last synchronization.
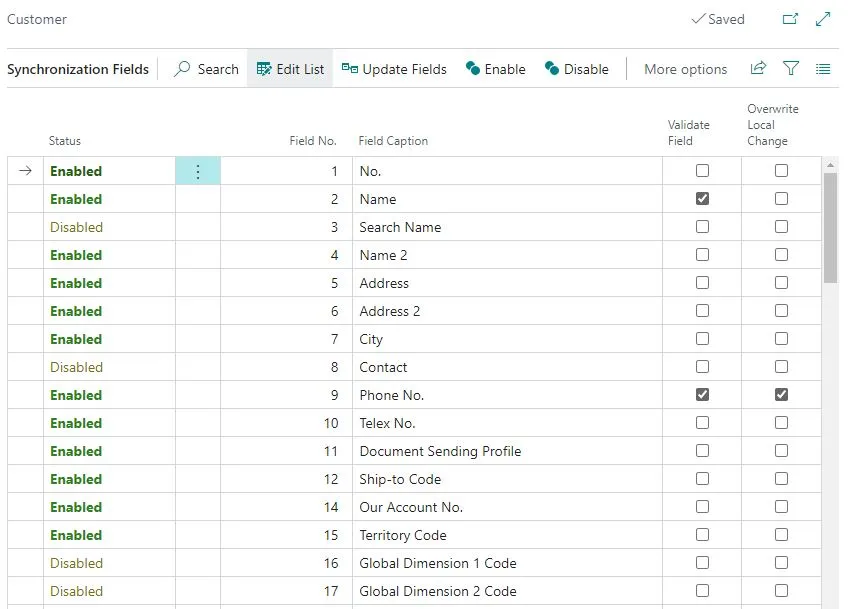
If the Overwrite Local Change option is not enabled and any changes have been made in the subsidiary company after the last synchronization, the synchronization process will result in error.
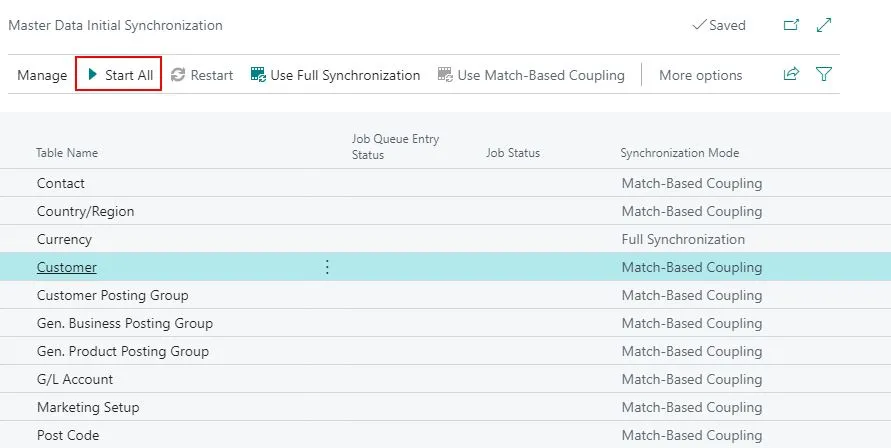
Once we are satisfied with the setup, click on “Start Initial Synchronization” to begin the synchronization process.
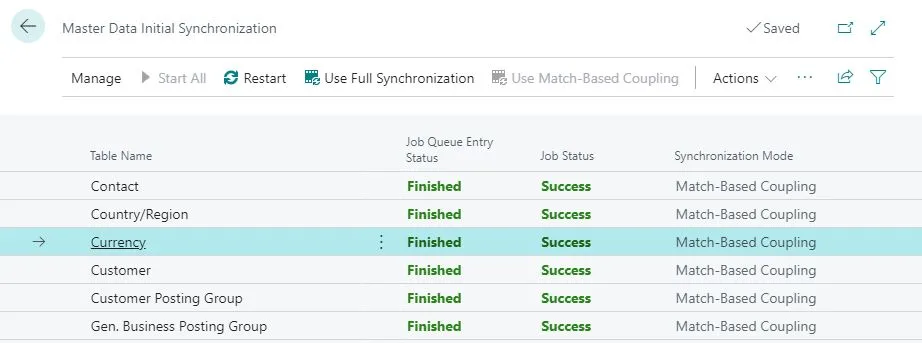
On Master Data Initial Synchronization page, we can see the list of tables that are synchronized. We can choose the type of synchronization that we want to use for each table.
-
Full Synchronization: This synchronization mode creates new records for all records in the source company that are not yet coupled. It’s useful when the subsidiary company has no data in the table or when you simply want to add records from the source company without matching.
-
Match-Based Coupling: This synchronization mode is chosen when we already have records in both the source and subsidiary companies and we want to match existing records. Business Central will match records in the subsidiary company with records in the source company based on matching criteria that we define.
![]()
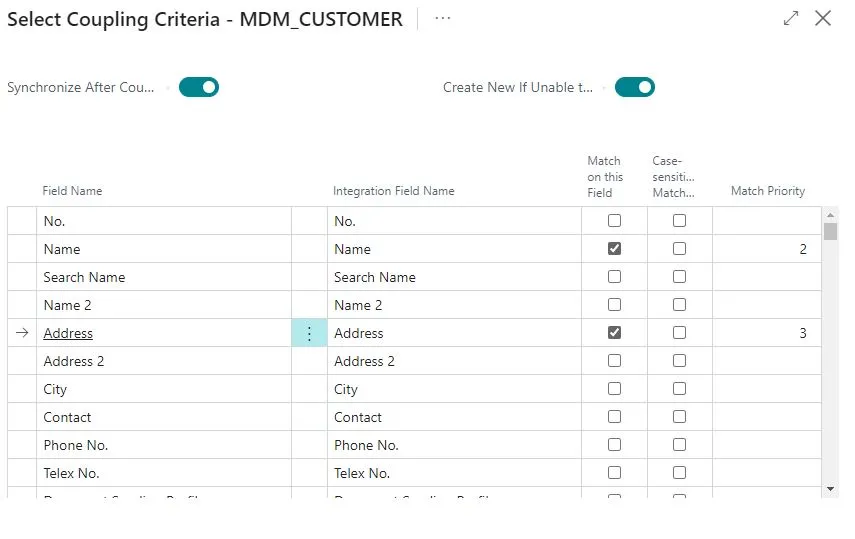
When using Match-Based Coupling, we can set up the coupling criteria by clicking on the synchronization mode. We can do the following things:
-
Specify which fields to match and whether the match is case-sensitive.
-
Prioritize the order in which records are searched by specifying a match priority. Business Central will search for a match in ascending order based on the match priority, where a blank value equals priority 0, the highest priority. For example, on the Customer table, we can set up the GST Registration No. as the first matching priority, followed by Name, and then Address.
-
Choose whether to create a new record in the subsidiary company if a unique, uncoupled match can be found using the match criteria. This can be done by turning on the “Create New if Unable to Find a Match” action on the header.
-
Choose whether to synchronize after coupling records.
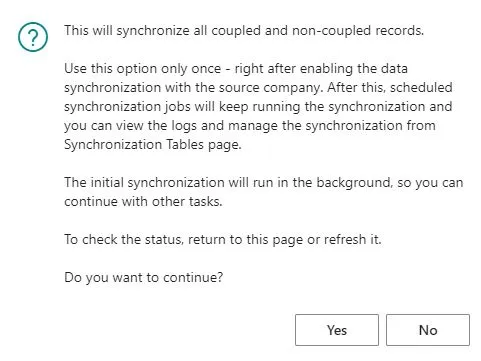
Clicking Start All will initiate the initial synchronization.
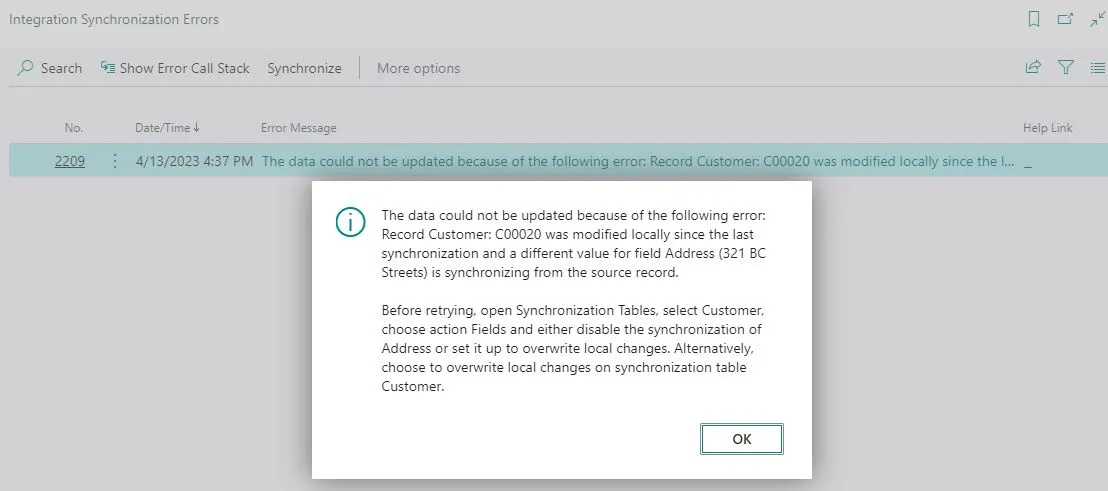
If there are synchronization errors, we can click and inspect the error details. For example, if there is an issue with Currency and the reason is that the same currency data already exists in the NZ Company.
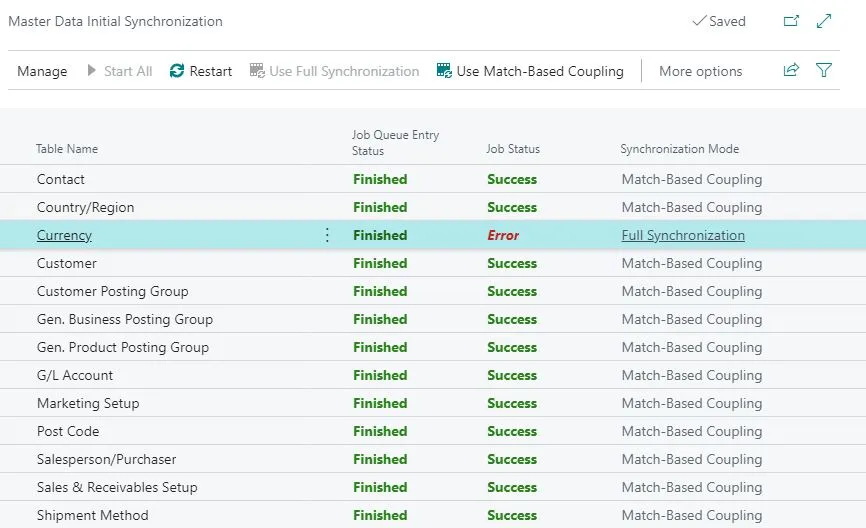
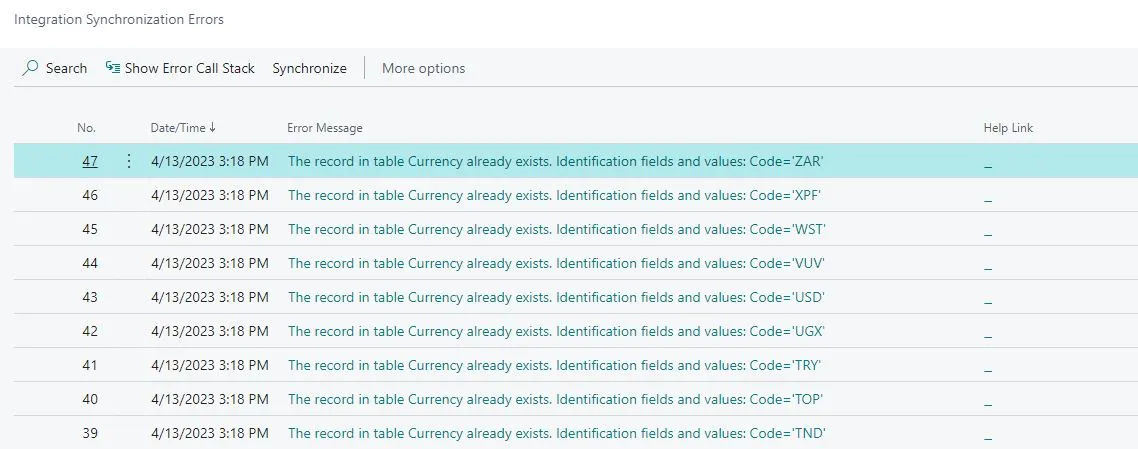
What we can do is to switch Currency to Match-Based Coupling and restart the synchronization.
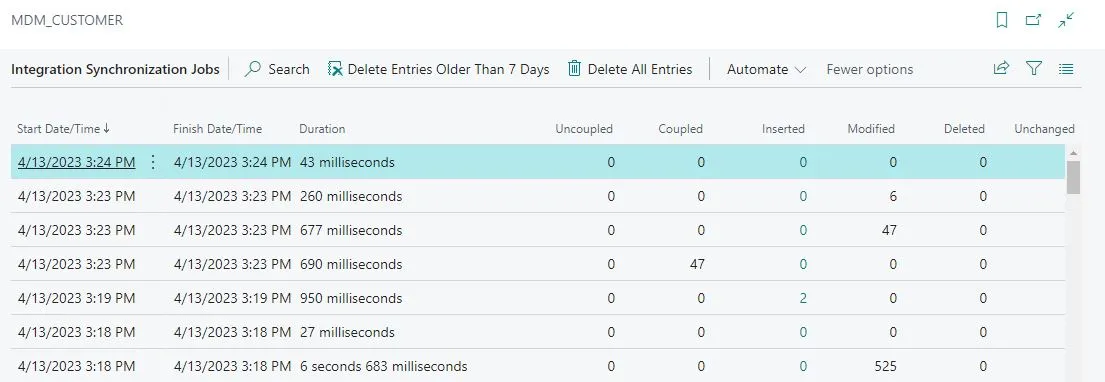
We can review the synchronization log by searching for “Integration Synchronization Jobs” or by clicking “Synchronization Log” from the “Synchronization Tables” page. The “Integration Synchronization Jobs” page allows us to investigate what happened each time a job queue entry ran. We can explore the details about new records that were added or why a record failed to synchronize by selecting the numbers in the “Inserted” or “Failed” columns. Additionally, we can use this page to clean up older records that are no longer needed.
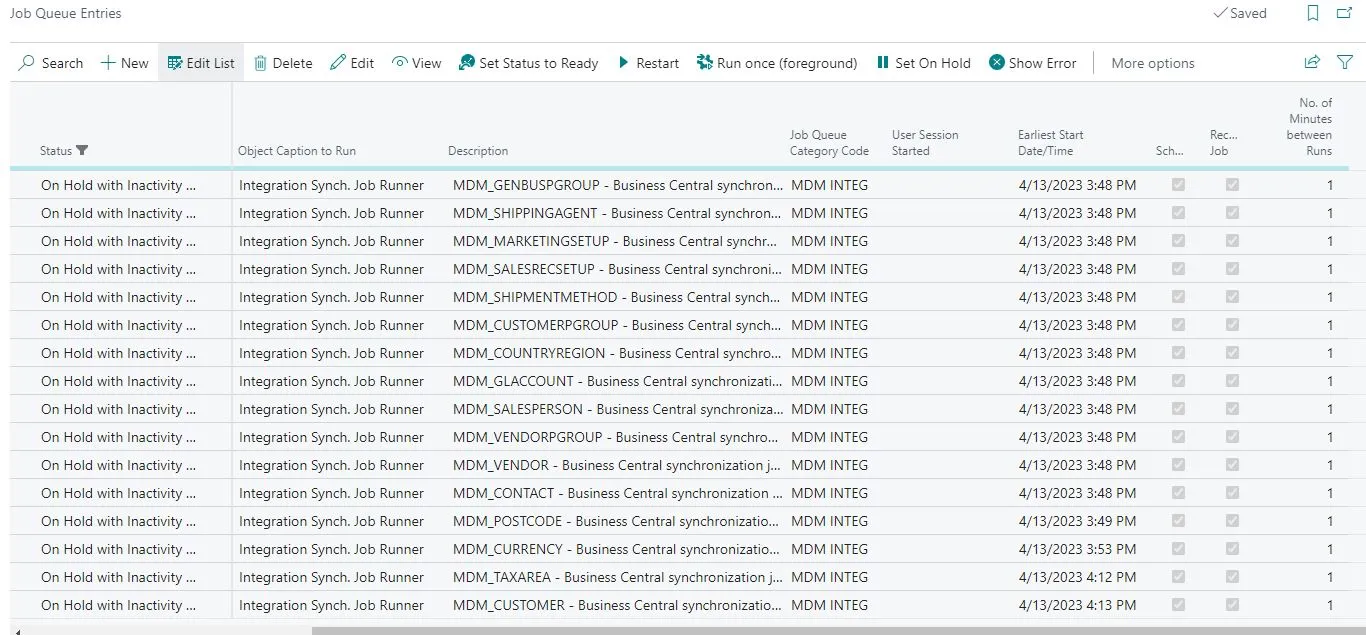
It’s important to note that Master Data Management relies on Job Queue functionality. We can view new Job Queue Entries for each synchronized table in the “Job Queue Entries” page, which are scheduled to run every minute.
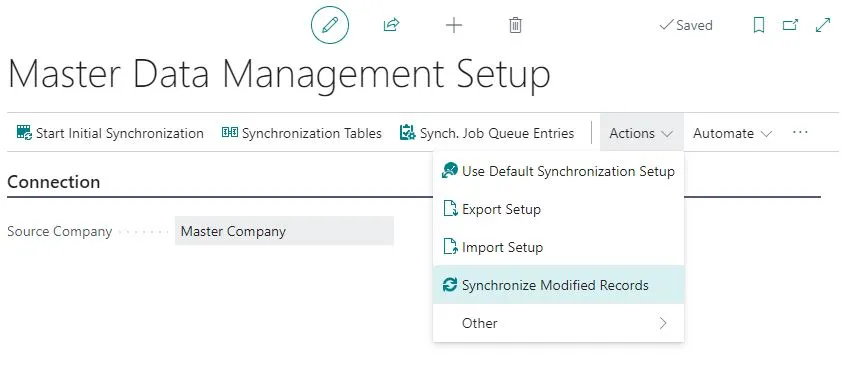
We also have the option to manually run the synchronization by clicking “Synchronize Modified Records” under Master Data Management Setup.
It’s worth mentioning that synchronization does not work on deletion. If a record is deleted in the source company, it will not be deleted in the subsidiary company to prevent unwanted loss of data. Any record deletions in the subsidiary company will need to be done manually.
That’s it. The Master Data Management feature provides powerful functionality for synchronizing and managing data between source and subsidiary companies. We no longer need to create a separate app for it.